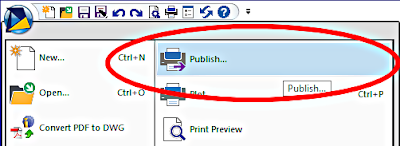
Batch plotting is a convenient way to print multiple documents and layouts in one run. The origin of batch plotting has its roots in the unsupervised overnight plotting of large numbers of drawings for CAD offices. The PUBLISH command was first introduced in progeCAD with a free update for progeCAD 2013 users several years ago. Since its appearance several years ago, progeCAD's publish command has expanded to embrace full batch-printing functionality, including the in-dialog ability to add and remove drawing files to the batch, as well as selecting specific layouts and workspaces from those files. progeCAD's PUBLISH command is essentially similar to the one offered in AutoCAD (which effectively replaced AutoCAD's older batch plot utility a few years ago). To begin batch plotting jobs in progeCAD, there are several ways to start the PUBLISH command:
 |
| ..From the "progeCAD Button" (similar to the "Office Button").. |
 |
| ..From the "Output" Ribbon Menu... |
 |
| ..By starting to type "publish" in the progeCAD Command Bar.. |
Once started, the PUBLISH dialog will display, allowing you many options for plotting multiple documents and workspaces as a single job:
As one can see, there are quite a few options here to work with. The basic idea is to create a list of drawing files - either from the currently opened files in progeCAD or using the "Add Drawing" button (triangle button with the plus, above). Individual workspaces (Layouts, model spaces..) can then be added or removed from the job list using the toggle boxes next to their name in the list. For example, to only print the layout (paperspace) drawings from files above, uncheck everything in the list with name ending in "- Model". You can also re-order the way drawings are printed in the publish job by individually selecting them and using the "Move ..up" and "Move .. down" buttons.
Clicking the "Options" button (top right) allows us to customize the job further:
For batch printing to a PDF or DWF file, the "Default Output Location" folder would be significant. You can also specify a single paper size or allow the job to use various paper sizes as specified by each individual layout. Headers, footers, even DWF security password can be specified in this options box if the user so wishes it. For more detail on the various options available in the PUBLISH command, we can first suggest the progeCAD 2017 "F1" included Help topics, such as "Customizing options when publishing to a file". Users are also free to post specific questions about using this or any other progeCAD command on the CADDIT user forum.
For more information about how progeCAD's powerful CAD functionality save's companies thousands in CAD software costs, or for a free progeCAD trial, visit the CADDIT website.


No comments:
Post a Comment